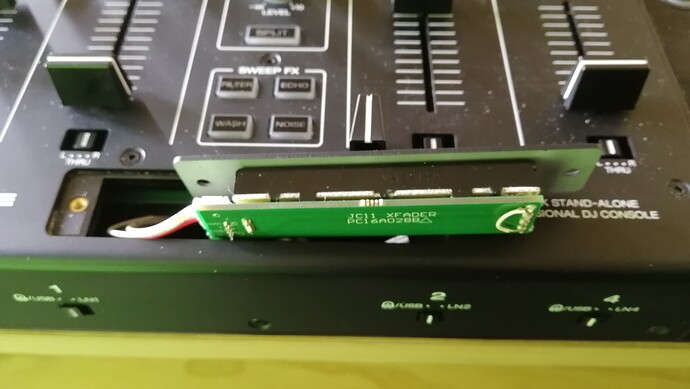
The cross fader of Prime 4 has contact problems and many times it happens that when it is at full left or right it doesn’t make good contact and if you move the crossfader slider a little you hear sound that you shouldn’t hear. Many times it is not necessary to replace the crossfader.
That’s how I fixed the flaw, and now it’s rock solid.
The Prime 4 crossfader has two linear potentiometers inside because it is designed for analog use with stereo channels, therefore it has two strips with two sliding contacts. However, the Prime 4 uses only one of the two potentiometers because it only needs an analog signal which is then converted into a digital signal and used by the internal MCU, therefore the double potentiometer is not needed.
With this tutorial we are going to use both potentiometers connected in parallel, so that if one of the two does not make good contact, then the other potentiometer will send the signal: with this method we obtain a double signal contact safety.
Unscrew the two outermost screws on the crossfader and gently pull the crossfader block out of its base as seen here. Remember the exact mounting position so as not to install it upside down: the white connector should be mounted towards the left side of the console.
Now it is necessary to have a soldering iron used for electronic technicians and carry out the welding of 6 pads as visible in the following photograph, see the part highlighted in yellow. Two pairs of pads are close together and therefore a small piece of wire can be used, while a slightly longer wire is needed for the outermost pair of pads. Carry out the work paying attention not to make short circuits between the pad and the base of the printed circuit, the green one.
At the end it is necessary to reassemble the crossfader and try. If everything has been done correctly then your crossfader will have no more problems when it reaches the left or right limit switch, the contact will be super reliable.

